Magnets
A few years ago, my friend Megan Horn gave me some magnets that I have absolutely adored ever since. Last Christmas, Bo and I copied the idea and made some magnets as Christmas presents. Here is what we did:
{Step 1} Take a clear stone that you get at craft stores (they look like vase fillers).
{Step 2} Modge Podge a piece of a magazine, craft paper or photo to the flat side of the stone. You should place the side you want to see face down. Let dry.
{Step 3} Adhere a magnet to the flat side where you just modge podged. The adhesive I used was called Goop. You could use a hot glue gun or anything that has a strong adhesion.
{Step 4} That's it!


Owen's Baby Blanket
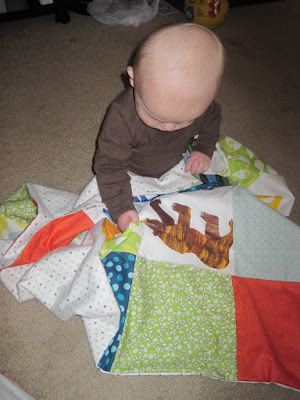
For my birthday, I got a sewing machine. I was inspired by this because while I was pregnant, I tried my hand at sewing with Carla Richey and Anna Judd. You can see what I made on this previous post. I also appliqued some onesies that Owen barely fit in. When I got my machine I tried some more burp cloths and they totally didn't work. And sew (get it?), I neglected my machine and my projects for the next two months. Then, I was inspired. I saw a cute and simple quilt on Etsy and decided I would try again. I went to the quilt store to get some fabric and came across this ridicously cute fabric of Eric Carle's illustrations in Brown Bear, Brown Bear and designed the quilt around that fabric. It was surprising simple after a few bumps. Here are the pictures and the "how-tos."
{Step One} Pick out your fabrics.
I choose my quilt to be 16 sqaures. I wanted four of them to be the Eric Carle squares. With 12 left, I decided the less expensive option and bought 6 fat quarters and decided to use them twice. For the back of the quilt, I choose a polka dot flannel that brought in a few of the colors.

{Step Two} Cut out your squares.
This is where I hit my first major bump. I almost didn't do the quilt because of this. I knew my squares needed to be at most 9 inches per side because I choose to use a Fat Quarter (which is 18 inches per side, I think). And so I tried to cut a square using my table as a guide. After I cut it out, I realized it wasn't a 90 degree angle. I got frustrated and this is where I stopped. A few weeks later I was sitting on my futon and realized I could make an accurate guide using an 8 1/2 x 11 card stock. I overlapped them and cut one down to make a square pattern with 8 1/2 inches per side. Success! I then proceeded to cut the remaining 15 squares while I drank some coffee and watched Owen play independently. :)


{Step Three} Arrange your squares.
Lay the squares out the way you want them arranged. Write down what you came up with.


{Step Four} Start Sewing!
I decided four squares together into four rows first. I took the top row and put two squares that are next to each facing in. I pinned them on the side they were connected at and sewed a straight line. I just choose one of the lines on the machine and had that be my marker. I'm sure you normally do that, but I have no idea how to sew. After the first two are connected, sew the third square onto the second in the same fashion. Do it again for the fourth. Do all four rows the same way. Next, sew the rows together in the same way. Finally, cut out the back piece to fit the size that your quilt became. Turn inside out, pin, sew all but one side of a square. Bring the inside out and sew the final side really close to the edge. You have a baby blanket!


I'm so impressed! Did you see my latest post?? I found an awesome website where you can order fabric that you design - Spoonflower.com. Also, I was saying how I am an aspiring seamstress. How I wish you lived in town and we could learn together. Except you're already MUCH more advanced than I am. :)
ReplyDelete